
What’s the difference between On and Off-Camera Flash?
Well, the initial answer is pretty simple. On-camera has the flash mounted to the hot shoe on top of the camera. Off-camera the flash is positioned away from the camera and is set off by a trigger attached to the camera, or by the light of another flash.
The hot shoe is the metal fitting on top of the camera where the flash mounts. The contacts on the hot shoe communicate with the flash or accessories mounted on it.
When a flash is triggered by the light from another flash, it is called ‘slave’ mode. If you have 2 flashes, you can trigger one and have the 2nd one set to slave so it flashes at the same time. In fact, you can have as many lights as you need set to ‘slave’ and only need to trigger one of them.
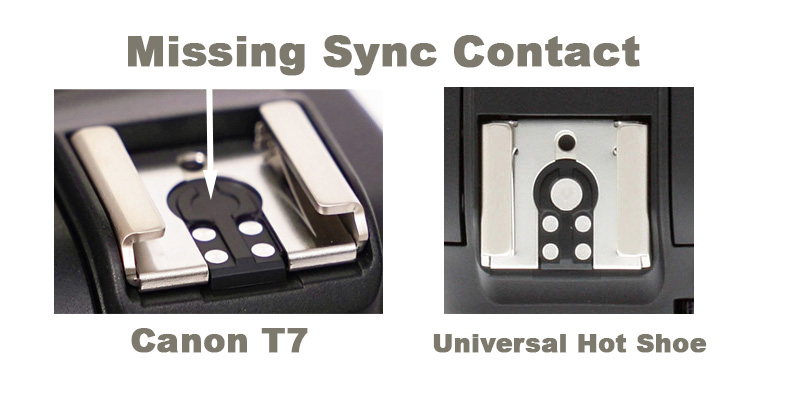
The Canon hot shoe problem.
Before I get into this, owners of Canon T7, T100, and SL3 need to know something. For some reason, Canon messed with the hot shoe on these models. They removed the sync contact, which is the largest of the 5 contacts on a hot shoe. By doing this they don’t allow you to use 3rd party flashes, only Canon.
Camera-branded flashes, like Canon and Nikon, are very expensive around the $600 mark. So basically Canon expects you to spend another $600 on a flash for your $450 camera.
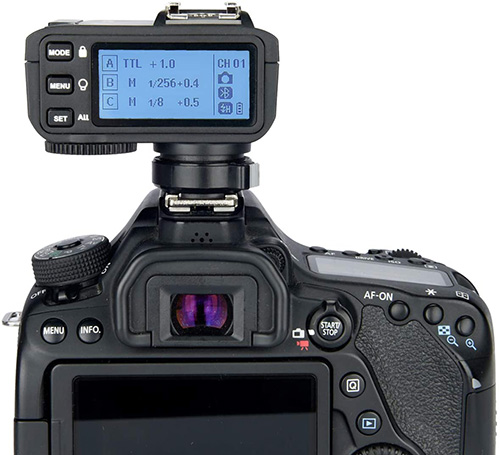
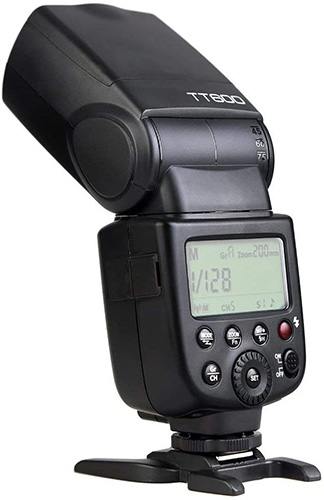
There is a way to get around this problem if you buy Godox. The best option for shooting off-camera is the Godox TT600 flash and an X2T-C trigger. If you want to shoot on-camera you could buy an L Bracket mount and use the same Godox setup. Godox has programmed their triggers to work in manual not TTL. TTL is Through The Lens and allows the camera to control the power of the flash. Manual settings on a flash are easy to use so don’t worry.
On-Camera Flash
When you mount your flash on the camera don’t make the mistake of pointing it directly at the subject. This will create a very harsh light and possibly the dreaded red-eye. What most photographers do is bounce the light off the ceiling or a wall. This lights up the area with a softer light. Check the color of the wall or ceiling you are bouncing off as strong colors will put a cast on your image.
I use a Sto-Fen Omni-Bounce Diffuser that fits onto the flash. It’s translucent plastic and softens the light. Even with the diffuser on I still aim to bounce some of the light off another surface. I use this method during weddings and events, all other times I use off-camera flash.
There are lots of expensive flash diffusers on the market but I find the simplest methods work best.
Off-Camera Flash
If you want to shoot Portraits and Headshots you need to learn how to use off-camera flash. This is the area of photography that allows the photographer to get creative. There are no boundaries here, you can use one flash or as many as you need.
To get started you need a basic one-light setup that includes a flash, trigger (transmitter), light stand, translucent umbrella, and an umbrella/flash bracket.
Flash and Trigger
The best bang for your buck is the Godox TT600 at approximately $130 with the X2T radio transmitter (trigger). This flash fits all brands of cameras, but if you own a Sony you need to order the TT600(S). The X2T trigger is manufacturer-specific, so if you shoot Canon you should order the X2T-C, Nikon is the X2T-N, etc.
 If you already have a flash that has a manual setting, then all you need is a trigger. You can pay anywhere from $20 to hundreds of dollars. Just remember all you want it to do is make your flash fire when you take a photo. So try a cheap trigger and see if it works with your camera/flash setup. Canon T7, T100, and SL3 owners will need the Godox equipment though.
The huge advantage of using the Godox setup is that you change the flash settings from the Trigger (Transmitter) mounted on your camera. So it will save you some time walking by and forth during setup.
Light Stand
You need a light stand that can position your light over 7 feet and be stable. Amazon and eBay have them around the $30 range. Check out your local Camera store also. A 6-foot tall stand would be ok if you are shooting small kids, babies, or dogs. If you are shooting adults you will need a 7+ feet tall stand.

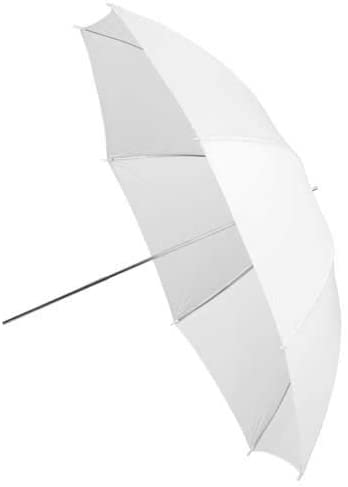
Umbrella
Umbrellas come in white, silver, gold, and translucent. With the white, silver, and gold umbrellas you aim your flash away from the subject and into the umbrella. The light then bounces out of the umbrella towards the subject. With the translucent one, you point the flash at the subject and the light passes through the umbrella. This gives a very soft light and is great for portraits and headshots.
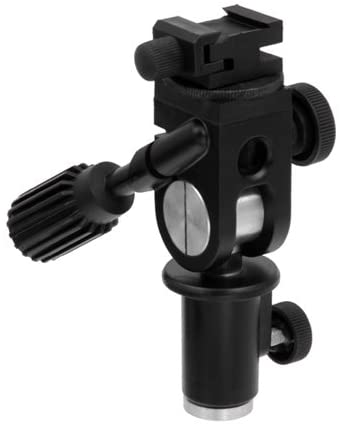
Umbrella/Flash Bracket
This attachment fits on the top of the light stand and is where you attach the flash to the cold shoe. A cold shoe is a hot shoe without communication contacts. It’s just a secure way to hold your flash. The bracket also holds the umbrella in place and allows you to swivel and tilt the light into the right position for the shot.

Manual Flash Settings
The settings in flash manual mode are very simple, they are FULL – ¾ – ½ – ¼ – ⅛ and so on. Take a shot at ½ power, if it’s too bright knock it down to ¼ and keep going until the lighting is the way you want it.
So that is all you need to start shooting with flash, whether it’s on or off-camera. Like I said earlier on-camera flash is perfect for weddings and events. For everything else, you need to work with your flash off-camera and get creative.